Midify Configuration Files
Midify Configuration Files
Midify is pretty easy to configure using a MIDI keyboard, but maybe you don’t have one available, or maybe you’re using a virtual keyboard in your sequencer software and it doesn’t give you an easy way to press more than one key at once. Here’s a Midify Configuration Command Pack you can download and use to send configuration commands to your Midify without needing a keyboard of any kind.
How To Use
First, connect your Midify board, Midify Your Skull board or Midi-Controlled Skull to your computer’s MIDI port and turn everything on.
Next, unzip all the files.
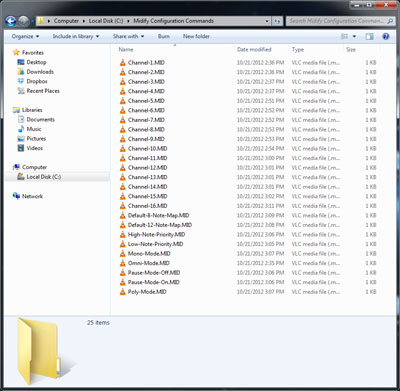
The files are standard .MID files, so you should be able to load them into any MIDI sequencing software. I’ll show you how to use them in Reaper, but the concept is the same for any software.
Launch Reaper and make sure all your hardware is configured in the settings (watch this tutorial for more information).
After you’ve launched Reaper and have a new project open, click Insert > Media File…
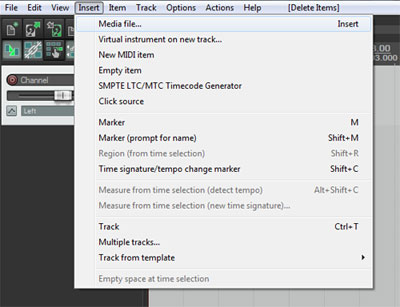
Browse to the folder where you unzipped all the command files and double-click on the command you want to run. In this tutorial we’ll change the MIDI channel to 4.

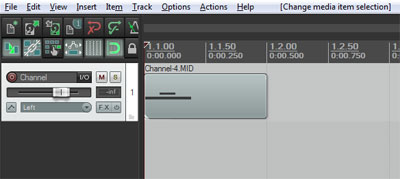
Now you’ll see a MIDI clip in your project. The idea is to play this file into the Midify board.
Next, click on the I/O button in the track controls on the left. Make sure the MIDI output your Midify board is connected to is selected under “MIDI Hardware Output”.
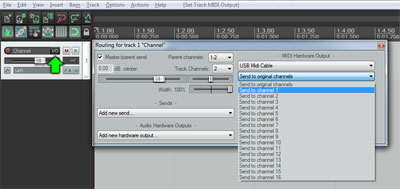
Select the MIDI channel Midify is currently set to in the channel box. This is important, or Midify won’t receive the command. If you’ve never changed your board’s channel then it’s probably still set to the default setting, which is Omni (receives on all channels). If this is the case then it doesn’t matter what channel you pick. If you do change the channel, remember it so you don’t have to guess later.
Close the box. You should now be ready to send the command.
Make sure the time marker is at the beginning of the project. The time indicator should be all zeros. Click the “Go to start of project” button if you’re not sure.
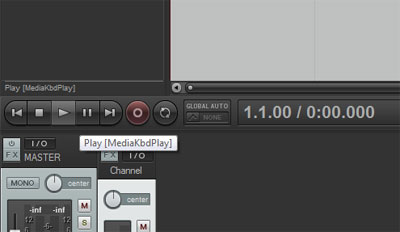
Click the “Play” button. The MIDI file will play into your Midify board. You won’t really see much happen, but Midify should be using the new configuration now.
Note: Sometimes when changing MIDI channels, you need to power Midify off and on again before it will respond to any more commands.
If you want to change other configuration options, insert the additional .MID files into the project one by one and play them into the Midify board.